Whether you’re looking to totally switch things up or want to try a brand new color without fully dying your locks, we’re betting you’ll adore rocking gorgeous dip dye hair this spring and summer. And, from bright pinks and beautiful blues to softer honey blondes and caramel tones, there’s a dip dye hairstyle to suit every personality and existing hair shade. So, what are you waiting for?
Keep scrolling and discover how to achieve stunning dip dye hair at home with HerStyler’s simple step-by-step guide. We’ll even answer all of your questions before getting started!
Why Go For Dip Dye Hair?

If you’re wondering whether or not dip dye hair is right for you, we can help.
How?
Aside from simply loving the way dip dye hair looks and being intrigued to give it a go, there are many other reasons why this particular technique could be the perfect option for you!
The Benefits of a Dip Dye
Firstly, we can bet you’ve been wanting to try out a bright new shade for a while. Pink, blue, green, orange, whatever it is you’ve been eyeing for as long as you can remember but are too scared to take the plunge! We totally get it. Switching up your hair from a ‘regular’ shade to something much more vibrant and eye-catching can be daunting. There’s the upkeep to think about. Plus, selecting the exact right shade to suit you and your wardrobe. And what if you simply just don’t like it once it’s on?!
Well, that’s where dip dye hair comes in. Think of it as a demo run for your dream color. You can wear it on the ends of your hair for a sneak peek into all of the above. See how it suits you, if it matches the clothing you like to wear, and whether you feel prepared to look after your new shade throughout your hair wash routine and regular color top-ups.
If the answer to all of those questions is yes, fully dying your hair could be a totally viable next step. That said, we won’t be surprised if you love your new dip dye hair so much that you keep it that way forever!
Other reasons to try dip dye hair?
There are plenty!
- It’s a trending dye technique for 2022. So, there’ll be plenty of color inspo out there for you to choose from
- It looks amazing on shorter and longer locks and gives a totally different look for both
- You’ll have the option to switch up your color more often since it’ll fade or be chopped off when you next have a trim
- It’s easier to control and get right at home than fully dying your locks
- You’ll use less dye than you would with full coverage color – it’ll probably save you money
- Lastly, it’s just an incredibly fun dying option that works so perfectly for spring and summer!
Is There a Difference Between Dip Dyed and Ombre Hair?

Thinking you’ve seen this dye technique somewhere before?
You’re right! Well, sort of right.
Dip dye hair and ombre hair might have similar results. However, the techniques used to create them are very different. Ombre hair uses a painterly effect, a little like balayage. This means the colorist will use a brush to gently blend the color applied to the ends. This creates a softer gradient. The result looks as though the two hair colors are fading into one another – the ombre effect!
When it comes to dip dye, however, you still of course have different colored ends. However, the line between them is intentionally sharp and blunt. This makes for a much more striking look. It’ll make your hair color truly stand out as opposed to blending in in any way. Both are beautiful – it really just depends on which style you’re after.
For us?
Dip dye hair is the one we’d choose for a statement look that’s full of fun, vibrancy, and tons of personality!
Will Dip Dye Hair Work on Darker Hair?
For natural blondes or those with bleached locks, dip dye hair is pretty easy to achieve. The color tends to take easier and last longer on a lighter base. You’ll also notice that you can see the color a lot more clearly. And, often, it’ll last longer too.
For those with black or brown hair, dip dying will be a little trickier to achieve. That said, it’s definitely possible!
You’ll likely need to start your dip dyeing process by lightening the ends of your hair. Basically, wherever you’d like the color to be, that’s the part you need to lift. For those with very dark hair, a slightly lighter shade unfortunately won’t do the trick. You may need to consider a gentle bleach formula to lighten the ends.
However, if your hair is brown but on the lighter side, you may be able to get away with something like a ‘baby blonde’ shade on the ends to lift them just enough. How light you go before applying your desired final color really depends on how vibrant you want it to be.
So, if you’re after a hue that packs a punch, make sure your ends are nice and light. If you’re only looking for a hint of color, just a slightly lighter shade should be fine.
Are There Different Kinds of Dip Dye?

When we think of dip dye hair, we often imagine light blonde locks with bright fuchsia or electric blue ends or something very similar. And, whilst this is gorgeous and a look we’ll always love, it’s certainly not the only way to create a dip dye hair.
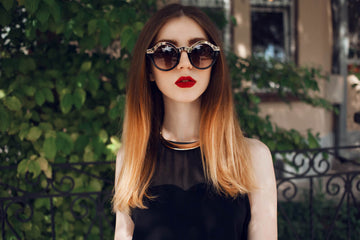
Lighter hair with darker/more vibrant ends is the first way to achieve this look. You’ll be destined to stand out and your traditional dip dye will gain you an endless stream of compliments. Alternatively, you could always opt for the exact opposite! Darker hair with lighter ends. This is a super fun, not to mention a super-sophisticated, way of turning this dye technique upside down – literally!
Personally, we adore how this look embraces darker locks and works so amazingly well for those wanting to dip their toe (sorry, their hair) into the world of lighter locks.
For example, why not opt for beautiful chestnut tresses with honey blonde ends? This style will have stunning undertones of red throughout to keep your tresses looking chic and uniform. Plus, the lighter ends will be beautiful in summer whilst the deep brown section leads the way in the colder months!
How Long Does Dip Dye Hair Last?
As with any hair color, how long the vibrancy of your color remains depends on a few main factors.
- The color your hair was to begin with
- The type of dye you use (semi-permanent, permanent, etc)
- How well you take care of it
Repeatedly washing your hair with a non-color-safe shampoo will, of course, cause the color to fade much faster. Equally, if you’ve only used a wash-in wash-out color, or a semi permanent formula, you’re looking at your color lasting anywhere from a few days to a couple of weeks only.
However, if you’re hair was properly prepared for dyeing, you’ve used a more permanent color, and you’re washing your hair only when needed and using a shampoo and conditioner made for colored hair, you can expect your dip dye to last around six weeks!
How to Dip Dye Your Own Hair
If you’re raring to go with lightened ends and your box dye in hand, we’re ready to show you how to achieve the dreamy dip dye hair your desire! Simply follow the steps below and, in no time, beautiful, vibrant, dip dye hair will be yours!
Prepare Your Hair

The key to shiny, healthy-looking dip dye locks?
A great conditioning treatment!
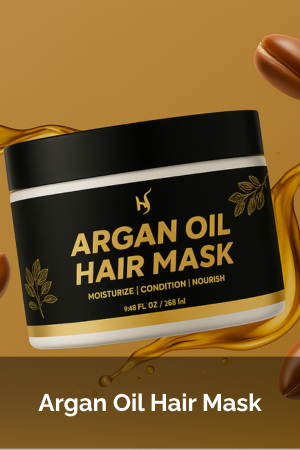
Whether your hair is cute and super-short or long and flowy like a mermaid’s, you can never underestimate the power of conditioner and regular hair masks. They’ll leave your hair feeling glossy, strong, and easy to de-tangle. Plus, they’ll hydrate your hair, making it feel super-healthy and ready to receive the dye. Our favorite to use in the lead-up to coloring is the Herstyler Argan Oil Hair Mask. It is infused with, you guessed it, Argan oil and also Panthenol.
Once your hair has been washed, conditioned, and is fully dry, you can go in with your dye. Just make sure you don’t skip the next step beforehand!
Prepare the Area
Whether you’re using a wash-in wash-out dye or a permanent one, getting your color where you don’t want it is a hassle that nobody wants or needs!
Luckily, creating an at-home salon is simple as laying down a few spare plastic bags. Alternatively, use a couple of older towels you don’t mind getting a little stained with color! Lay them underneath you, so if any color drips they’ll catch it. Be sure to rinse out your sink or bathtub if you drip any color in there by mistake.
Meanwhile, make sure whatever you’re wearing isn’t precious to you either. Think old pajamas, an old t-shirt, or, if you don’t have any of those, wrap a dark towel around your shoulders. Just check you haven’t accidentally left any of your hair tucked underneath!
De-Tangle Your Locks
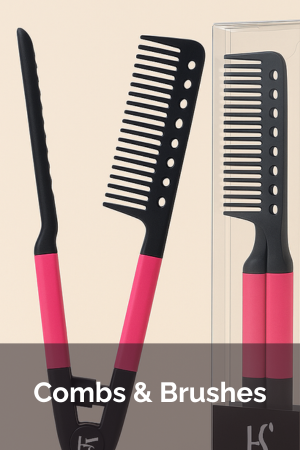
Before you start applying your dye, we can’t stress how important it is to ensure your hair is tangle-free. If it isn’t, you run the risk of accidentally dying too far up the hair where a piece has gotten tangled. This will ruin the effect of your blunt line dip dye. Always use a detangling brush and make sure it glides through before getting color anywhere near those precious tresses!
Finally, style your hair into your desired parting. This determines how the final look appears. So, it’s usually best to go with the parting you would usually wear day to day rather than mixing things up at the last second.
Mix Your Color

Now for the fun part! Since you, your hair, and your bathroom are prepped, you can go ahead and mix your dye as instructed on the box.
It’s important to wait until now so that you can apply the dye immediately after it’s mixed/exposed to the air. If you leave it out for too long beforehand, it may overdevelop or not take as well to your hair. So, don’t be tempted to mix it up before you need it!
Section Off Your Hair
Using hair elastics that you don’t mind getting dye on, you’ll now want to divide the hair into sections ready for the dye. If your hair is on the finer side, simply dividing it equally down the back and into two equal parts should work perfectly for you. If it’s thicker, consider three sections instead. One on the left, one on the right, and one at the back. This should keep the dye line even all the way around.
Now for positioning the hair elastics! These will decide where your dye stops so be sure to get it right before applying your color. If your hair is medium-length or longer, we recommend placing the bands just below your chin. For shorter locks, try an inch or two from the ends of your hair.
That said, how you design your dip-dye is totally up to you. Don’t be afraid to play around with the positioning of your hair elastics before you make your final decision.
Apply the Dye
With your hairbands secure, your gloves on, and your dye in the bowl, use your dye brush to transfer the color evenly onto your hair. If you need to, use your fingertips to work the dye through your ends so your get an even coverage. Much like you would with conditioner.
Also, don’t accidentally move your hair bands in the process! Leave the dye for the allocated time on the box, then very carefully remove the hair bands.
Rinse

Use lukewarm water to wash the dye away so you don’t damage your freshly dyed tresses. We also recommend using your fingertips to coax the dye out gently as you rinse. This way, it won’t transfer onto other areas of your hair.
And just like that, you’re done!
Ready to Dip Dye Your Way to Perfection?
Are you ready to achieve the dip dye locks of your dreams? Which color will you opt for this sunshine season? Whichever you choose we’re betting you’ve just found your new favorite hair trend for 2022!
To treat yourself to some new styling tools to take your dip dye hair to the next level, check out HerStyler’s bestsellers here.

