Building the Perfect Hair Care Routine: Step-by-Step Guide

Want your hair to look glossy, bouncy, and beautifully healthy? This all comes down to your hair care routine. Give your hair the attention and love that it needs and you’ll be rewarded with a mane that you can flaunt with provide.
So, what does the perfect hair care routine consist of? Read on as HerStyler shares a step-by-step guide.
Step 1: Cleansing
The very first step of your hair care routine will likely also be an obvious one; cleansing. After all, if you don’t begin by cleansing your hair, none of the other hair care products that you use will make much of a difference. Your strands will be coated with a layer of grime that will not only block other products from penetrating your hair but will also leave your hair looking limp and dull.
When choosing a shampoo, pick a formula that is suitable for your hair type. If your hair is thin and naturally quite greasy, you’ll need a more powerful shampoo than someone with dry and damaged hair, which requires a gentler touch.
It’s also important to ensure that you don’t shampoo your hair too often, no matter your hair type! Doing so too often could strip your hair of its natural oils and protection, leaving your locks more susceptible to damage and dryness.
Step 2: Conditioning

Since washing your hair removes its natural conditioning agents, you need to immediately compensate for this by using a conditioner. Shampooing without conditioning will leave your hair feeling rough and difficult to manage. A conditioner will also smooth your hair cuticles to ensure a shinier finish.
Again, choose a conditioner based on your hair’s needs. Fine hair will need a relatively lightweight conditioner. It doesn’t take much to weigh this hair type down! Look for one packed with humectants, which hydrate the hair without adding grease. Meanwhile, if your hair is dry or damaged, a rich conditioner is exactly what you need. Formulas that contain plant oils will give your hair the moisture boost that it craves. You’ll find the perfect shampoo and conditioner combo for this in the HerStyler Gift Set for Women.
One final tip – keep your conditioner away from your scalp. Your scalp will soon produce more of its conditioning oils – it’s the ends of your hair that benefit from the use of a conditioner since this is the driest part of your hair.
Step 3: De-Tangling

If your hair isn’t very tangled, then go ahead and save this step for once it’s dry. However, if you’ve neglected your locks for a while and have a number of tangles to work through, the best time to do this is while your hair is coated with conditioner. Although your hair may be more prone to breakages when it’s wet, a conditioner will give it the elasticity and flexibility that it needs in order to be de-tangled without snapping.
Ideally, start de-tangling with your fingers. They’ll be much more sensitive to knots in your strands than a comb or brush will. Run your fingers through your hair and when you encounter a knot, use your fingers to gently separate those tangled strands.
Once you’ve done that, you can then finish the job with a detangling brush. There are plenty out there – find one that’s convenient for you to work with. While some are designed to fit in the palm of your hand, de-tangling brushes that have handles, like a regular hairbrush, can sometimes be easier to use. The HerStyler Detangler Hair Brush is one such brush. It still has an ergonomic, anti-slip grip but is much easier to navigate through thick hair.
Step 4: Towel Drying
Once you step out of the shower with your freshly washed, conditioned, and tangle-free hair, you need to make sure that you don’t undo all of that hard work with an incorrect towel-drying technique. Your hair cuticles will now be smoothed down by your conditioner. Roughing them up by rubbing your mane with a terrycloth towel will only cause them to stand up again. This will result in dull and frizzy strands.
Instead, use a microfiber towel to gently squeeze and blot away excess moisture. Thanks to how absorbent microfiber is, this task usually doesn’t take long.
Then, while you may be tempted to skip straight to the blow-drying stage, give your hair some time to air dry first before moving on to the next step of this hair care routine.
Step 5: Hydrating and Sealing

One of the best times to give your hair some extra hydration is while it’s wet. There are different products out there that can help with this but hair serums tend to be the most popular. They’re lightweight yet have the potential to be exceptionally hydrating. Hair serums usually also contain ingredients that will lock that moisture in, preventing it from evaporating away.
The HerStyler Castor Oil Hair Serum does this well. It contains a blend of aloe vera, castor oil, argan oil, and vitamin E. All four ingredients are revered for having both hydrating and moisturizing properties, which is how this hair serum is able to give the hair some instant shine!
Step 6: Protecting
If you’re planning on leaving your hair to completely air dry and aren’t going to heat style, you can end your hair care routine right here. However, if you’re aiming for a bouncy blowout or want to straighten or curl your locks, then protecting your strands is essential.
You’re probably aware of how damaging heat can be for your hair. Whether this comes from your blow dryer, flat iron, curling wand, or anything else, allowing this heat to come into direct contact with your strands will only leave them brittle and damaged in the long run.
This is where heat protectants come in. They’re available in many forms, from serums to mousses to sprays. However, they all share a common goal – forming a barrier over each strand so that the heat protectant takes the brunt force of the heat, saving your hair from burning.
Pay attention to the ingredients in the heat protectant you choose. Certain ingredients, like argan oil, have been proven to be highly effective at keeping the hair feeling protected from damage.
Step 7: Drying and Styling

Now that your hair has been protected, wait until it’s about 80% dry before finishing the job with your blow dryer. Ideally, you want to limit the amount of time your hair spends in contact with heat, which is why you shouldn’t go straight in with your blow dryer when your strands are soaking wet.
Once your hair has fully dried, you can then move on to heat styling. Although heat styling may not technically be a part of your hair care routine, how you heat style your hair will have a huge impact on the care that your strands need. As always, keep damage to a minimum and your hair will look much healthier overall. This then makes your hair care routine much easier!
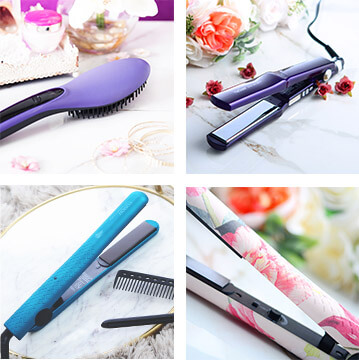
How do you keep the appearance of heat damage to a minimum? By using high-quality heat styling tools. The HerStyler Colorful Seasons hair straightener, for example, features ceramic plates. This material is known for being gentle on the hair. It also comes with an adjustable temperature dial, enabling you to decide just how much heat your hair is subjected to.
Added Extras
The above steps depict a hair care routine that you can follow on a regular basis. However, sometimes, your hair may need a little extra, which is where the next two steps come in:
Deep Conditioning
If your hair is dry or damaged, a deep conditioner can be a very helpful product to have. Deep conditioners usually contain a higher concentration of emollients and hydrating ingredients than regular conditioners. This makes them thicker and richer, which is why you won’t need to use them each time you wash your hair. However, once a week or so, a deep conditioner can be an effective way to quickly give your hair a moisture boost.
Targeting and Treating
Of course, everyone’s hair is different. What your hair needs may be the complete opposite of what your best friend’s hair requires. This is why it’s important to take your hair’s unique needs into account when putting together a hair care routine.
How? Make a list of the hair problems you want to target. Be it frizziness, dryness, oiliness, dullness, or anything else, decide which you want to prioritize. Then, seek out hair care products that have been designed to target those specific issues. It goes without saying that if you don’t have any hair problems, then you can go ahead and skip this step!
Adjusting Your Hair Care Routine With the Seasons
You now know the steps involved in putting together the perfect hair care routine. However, this doesn’t mean that you can now follow that routine for years. Instead, you may need to adjust your routine as the seasons change.
Why is this? Because the changing seasons mean that your hair’s needs change too. For example, your scalp produces more oil in the summer than it does in the winter. This may call for a more powerful shampoo, as well as a lighter conditioner. In the winter months, when the cold temperatures and lack of humidity cause your strands to feel dehydrated and dry, you may need to opt for richer hair care products that keep your locks feeling protected from the harsh environmental conditions around you.
Summary
As you can see, there’s lots to consider when it comes to putting together the perfect hair care routine. However, approach the task methodically, taking things one step at a time, and your new routine will soon become second nature. Be consistent with your hair care efforts and it won’t be long before you start to notice some big improvements in how your hair looks and feels.
Click here to elevate your hair care routine with more bestselling products from HerStyler.


